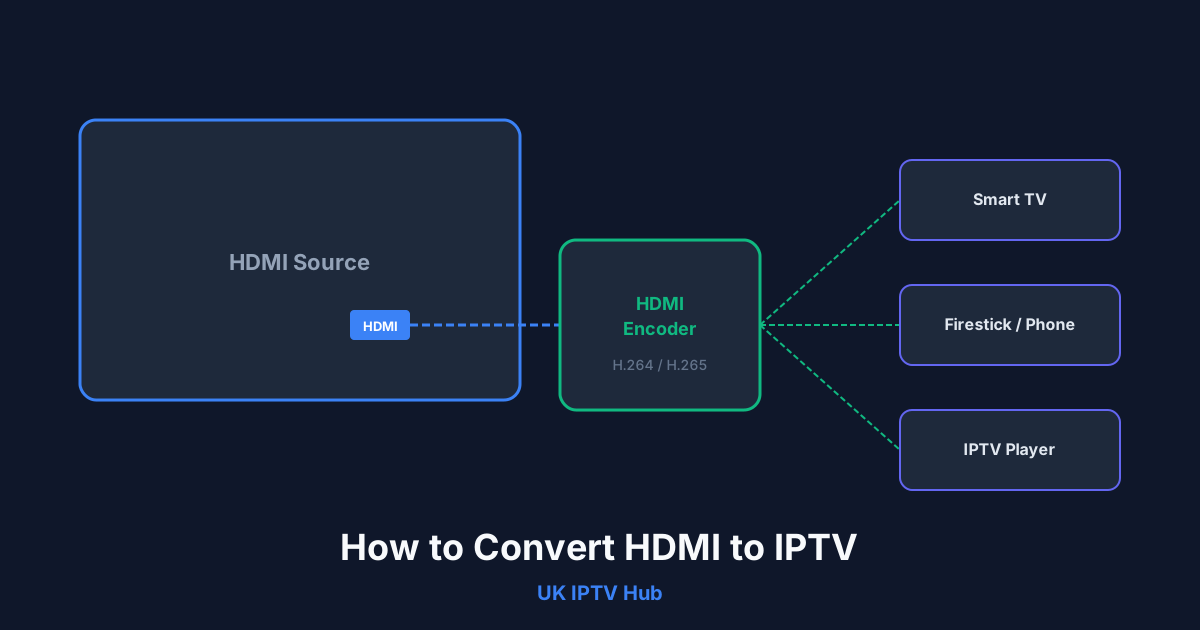
To convert HDMI to IPTV you need an HDMI video encoder that captures the HDMI signal, compresses it into a streaming format such as H.264 or H.265, and outputs it as an IP stream (RTSP, RTMP, HLS, or UDP) that any IPTV player or middleware can receive. This process turns any HDMI source — a satellite receiver, cable box, gaming console, or camera — into a network-delivered television channel viewable on smart TVs, Firesticks, phones, and set-top boxes across your local network or the wider internet.
What Does Converting HDMI to IPTV Actually Mean?
Converting HDMI to IPTV is not about turning a physical cable into software. It is about taking the uncompressed audio-video signal that travels over an HDMI cable and encoding it into a digital stream that travels over an IP network. Traditional HDMI carries raw video at up to 48 Gbps (HDMI 2.1), which is far too large for network transmission. An encoder compresses that signal down to anywhere between 2 Mbps and 20 Mbps depending on quality settings, making it practical to distribute over Ethernet or Wi-Fi.
The result is a standard IP stream that behaves exactly like any other IPTV channel. You can add it to an M3U playlist, feed it into Xtream Codes or Stalker middleware, or simply open it in VLC or any IPTV player. According to the International Telecommunication Union (ITU), H.265/HEVC encoding reduces bandwidth requirements by roughly 50% compared to H.264 while maintaining identical visual quality, which is why modern encoders overwhelmingly support both codecs.
Equipment You Need to Convert HDMI to IPTV
Before starting the conversion, gather the right hardware. The centerpiece is an **HDMI encoder** — sometimes called an HDMI-to-IP encoder or IPTV encoder. These devices range from compact single-channel units under $100 to professional rack-mounted multi-channel systems costing thousands.
Here is what you will need for a basic setup:
- **HDMI Encoder**: A device with an HDMI input and an Ethernet output. Popular budget options include the Maono, J-Tech Digital, and Vecaster single-channel encoders. For hotel or commercial installations, brands like Thor Broadcast and Kiloview offer multi-input units with advanced management interfaces.
- **HDMI Source**: Whatever device produces the signal you want to stream — a satellite receiver, Blu-ray player, camera, game console, or even another IPTV box.
- **Ethernet Cable and Network Switch**: The encoder connects to your local network via wired Ethernet. Wi-Fi is technically possible but introduces latency and packet loss that degrades live video quality.
- **IPTV Player or Middleware**: On the receiving end, you need something to decode the stream. This could be as simple as VLC Media Player on a laptop, or as sophisticated as an IPTV app like TiviMate or IPTV Smarters Pro on a Firestick. Learn more about setting up players in our IPTV installation guide.
- **Optional: IPTV Middleware Server**: If you are distributing the stream to multiple users or rooms (such as in a hotel or sports bar), middleware like Xtream UI, Ministra (Stalker), or Flussonic manages access, EPG data, and user authentication.
For deeper technical specifications on encoder selection, the Society of Motion Picture and Television Engineers (SMPTE) publishes standards for IP-based video transport including SMPTE ST 2110, which governs professional-grade uncompressed IP video workflows.
Step-by-Step Guide: How to Convert HDMI to IPTV
Step 1: Connect Your HDMI Source to the Encoder
Plug one end of an HDMI cable into your source device (satellite box, camera, etc.) and the other end into the HDMI input port on the encoder. Make sure the source device is powered on and outputting a signal. Most encoders auto-detect the incoming resolution, whether it is 720p, 1080i, 1080p, or 4K. If your encoder only supports up to 1080p input, ensure your source is not set to output 4K, or the encoder will display a black screen.
Step 2: Connect the Encoder to Your Network
Use an Ethernet cable to connect the encoder's LAN port to your router or network switch. Power on the encoder. Most units ship with a default static IP address (commonly 192.168.1.168 or similar) printed on the label or in the manual. You may need to temporarily change your computer's IP address to the same subnet to access the encoder's web interface for the first time.
Step 3: Access the Encoder Web Interface
Open a web browser on a computer connected to the same network and type the encoder's default IP address into the address bar. Log in with the factory credentials (usually admin/admin or admin/password). Once inside, you will see the configuration dashboard where you control every aspect of the encoding pipeline.
Step 4: Configure Encoding Settings
This is the most critical step. Adjust the following parameters based on your use case:
- **Video Codec**: Choose H.264 for maximum compatibility or H.265 (HEVC) for better compression. Almost all modern IPTV players support both.
- **Resolution**: Match the encoder output to your source. If your source outputs 1080p, encode at 1080p. Downscaling wastes processing power; upscaling adds no real quality.
- **Bitrate**: For 1080p H.264, a bitrate between 4 Mbps and 8 Mbps delivers excellent quality. For 720p, 2–4 Mbps is sufficient. Higher bitrates mean better quality but require more network bandwidth.
- **Frame Rate**: Set to match the source — typically 25 fps (PAL regions) or 30 fps (NTSC regions). Sports content benefits from 50 or 60 fps if your encoder supports it.
- **Audio Codec**: AAC at 128 kbps or 192 kbps is the standard. Some encoders also support AC3 passthrough for surround sound.
- **Keyframe Interval (GOP)**: Set this to double your frame rate (e.g., 60 for 30 fps content). Shorter GOPs improve seeking and reduce buffering but increase file size slightly.
Step 5: Choose the Streaming Protocol
Your encoder will offer several output protocol options. Select the one that matches your playback ecosystem:
- **RTSP (Real Time Streaming Protocol)**: Best for local network viewing with VLC or dedicated IPTV apps. Low latency, widely supported.
- **RTMP (Real-Time Messaging Protocol)**: Ideal if you are pushing the stream to a media server like Wowza, Nginx-RTMP, or a CDN for wider distribution.
- **HLS (HTTP Live Streaming)**: Apple's adaptive streaming protocol. Works natively in web browsers and most mobile IPTV apps. Slightly higher latency (3–10 seconds) but extremely reliable.
- **UDP Multicast**: Used in professional and hotel IPTV deployments. One stream serves unlimited receivers on the same network without additional bandwidth per viewer.
Step 6: Set the Output URL and Start Encoding
After configuring everything, save the settings. The encoder will generate a stream URL that looks something like `rtsp://192.168.1.168:554/stream1` or `http://192.168.1.168:8080/hls/stream.m3u8`. Copy this URL — it is what you will paste into your IPTV player.
Want to try it yourself? Get a free 1-day trial.
Watch live channels and on-demand titles on your own screen for a day — before you pay a thing. No card details on this site.
Want to try it yourself? Get a free 1-day trial.
Watch live channels and on-demand titles on your own screen for a day — before you pay a thing. No card details on this site.
Step 7: Add the Stream to Your IPTV Player
Open your preferred IPTV application. In VLC, go to Media > Open Network Stream and paste the URL. In TiviMate or IPTV Smarters Pro, add the URL as a new M3U playlist entry or custom stream. The HDMI source should now appear as a live channel on your screen. If you are managing multiple encoded channels, consider building an M3U playlist file that lists all your stream URLs, making it easy to load them simultaneously. Our guide on the best UK IPTV channel lists explains how structured playlists improve navigation.
Choosing the Right HDMI Encoder for IPTV
Not all encoders are created equal. Budget models work fine for home use — converting a single satellite box to stream around the house. But if you are running a commercial operation, reselling IPTV services, or outfitting a hotel, you need enterprise-grade hardware with features like redundant power supplies, SNMP monitoring, batch management interfaces, and hardware-level failover.
When comparing encoders, pay attention to these factors:
- **Number of HDMI Inputs**: Single-channel vs. 4-channel vs. 16-channel chassis.
- **Encoding Latency**: Hardware encoders typically achieve 100–300 ms glass-to-glass latency. Software-based solutions often exceed 1 second.
- **Protocol Support**: Ensure the encoder supports the protocols your IPTV middleware requires.
- **Management API**: Professional encoders expose REST APIs for integration with automation platforms and middleware dashboards.
- **Hardware Reliability**: Fanless designs, industrial temperature ratings, and metal chassis matter in 24/7 environments.
If you are exploring the reseller side of IPTV and want to understand how providers build their channel lineups from captured sources, our breakdown of how IPTV resellers operate covers the business model in detail.
Common Problems and How to Fix Them
No Video After Connecting the Encoder
Check that the HDMI source is actually outputting a signal. Some devices disable HDMI output when no display is detected — use an HDMI splitter or dummy plug to force the signal. Also verify that the source resolution does not exceed the encoder's maximum input capability.
Buffering or Pixelation on the Receiving End
This almost always indicates insufficient network bandwidth or a bitrate set too high. Lower the encoder's bitrate by 20–30% and test again. Ensure the encoder is connected via Gigabit Ethernet, not a 100 Mbps port or Wi-Fi. Check your switch for errors or dropped packets.
Audio Out of Sync with Video
Audio-video sync drift occurs when the encoder's audio and video pipelines have different processing latencies. Most encoders include an audio delay offset setting in their web interface. Adjust it in 50 ms increments until lip-sync is correct.
Stream URL Not Opening in IPTV App
Verify the protocol. Some apps do not support RTSP natively and require HLS or RTMP instead. Check firewall rules on the encoder's subnet — port 554 (RTSP), 1935 (RTMP), or 8080 (HLS) must be open. If accessing remotely, ensure proper port forwarding or use a VPN tunnel rather than exposing the encoder directly to the internet.
Legal Considerations When Converting HDMI to IPTV
Converting your own HDMI sources to IPTV for personal use within your home network is perfectly legal. However, redistributing copyrighted content — such as premium cable channels, live sports broadcasts, or movies — without authorization violates copyright law in virtually every jurisdiction. If you are building an IPTV service for others, ensure you have proper licensing agreements for every channel you encode and distribute. For a detailed overview of compliance requirements, read our article on IPTV legality and regulations.
Why Convert HDMI to IPTV Instead of Using Traditional Distribution?
IP-based distribution eliminates the need for coaxial cabling, RF modulators, and proprietary set-top boxes tied to specific frequencies. Once a signal is on the network, it can reach any device with a screen and an IP stack. Hotels use this to deliver hundreds of channels over existing Ethernet infrastructure. Home users leverage it to watch their satellite subscription in rooms without a dish connection. Businesses use it for digital signage, training streams, and live event broadcasting.
The flexibility of IPTV also means you can integrate your converted HDMI stream alongside traditional IPTV subscriptions. Many users combine their own encoded local channels with a broader UK IPTV subscription to create a unified viewing experience across all their devices.
Final Thoughts
Converting HDMI to IPTV is a straightforward process once you understand the role of the encoder and the protocols involved. Invest in a reliable hardware encoder, configure your bitrate and codec settings carefully, choose the right streaming protocol for your audience, and test thoroughly before deploying. Whether you are streaming a single camera feed to another room or building a multi-channel distribution system, the core workflow remains the same: capture, encode, transmit, and play.
Ready to explore premium IPTV channels alongside your own encoded streams? Start your free trial with UK IPTV Hub today and experience the best British and international content delivered directly to your screen.